Pages

Monday, December 24, 2012

Reflecting on Christmas: Perspective given by my children


In years past, I have made a valiant effort to find the “ultimate” gift for each person on my list. Often, I have spent hours shopping (which, if you know me, equates to torture of the nth degree). Budgets have been blown, and sticker shock is drowned out by Christmas carols played at too-high a volume on the ride home.

This year, my four-year-old is really starting to ask a lot of questions. Like, why do we have Christmas? Why do we give presents?

As my husband and I work to give thoughtful, rather than off-the-cuff, answers to each of his (million) questions, it has led me to think of our gift-giving in a deeper way. Why should we punish ourselves in the desperate search for the “ultimate” gift? The holiday is so much more about honoring the birth of Christ than whether or not we got that Nintendo WII we were hoping for. I’m not saying gift-giving is wrong, by any means. I confess to having a few things on my wish list this year. But give JOYFULLY! Unless it is another fruitcake, your loved ones will more often than not be pleased with whatever you find.


It was mentioned in our first December MOPS meeting, during our holiday tips discussion, that one person gives only 3 gifts to each child, in memory of how many gifts were given to Jesus. Those gifts were thoughtful and meaningful! Surely we can do the same without killing ourselves (figuratively) over our shopping?

This year, I have decided to put together gift baskets for each home we are visiting. There will be a little something for everyone. Mostly, it will be food, but food that is created lovingly and thoughtfully with our own hands. It can sometimes be hard to find the time to dedicate to this, but my little four-year-old kitchen helper is right there by my side, encouraging me. He is keenly interested in measuring, pouring, and sprinkling. I have put him in charge of spreading the sprinkles on the chocolate dipped pretzels. He took this job very seriously, and did it extremely well. He also helped pick out the cookie cutters to use for the salt-dough ornaments, and directed me in their placement on the cookie sheet.

If he can have that much enthusiasm for creating and giving, I can too!
Friday, December 7, 2012

Thanksgiving... the crunchy way?

Last year, I decided to make pumpkin pie from an actual pumpkin, for the first time ever. I received so many compliments on it, that of course I had to do it again this year.

The whole process takes a while, but is actually fairly simple. I wish I had pictures for you, but of course I never remember to take pictures until after the fact. However, there are lots of lovely pictures at the website that I used to learn to do this, here: Pickyourown.org

The first thing you want to do is wash the entire pumpkin. Preheat your oven to 350 degrees. Then, VERY carefully cut your pumpkin into wedges. For a small pumpkin, you can just quarter it. A larger pumpkin may need to be cut into sixths or eighths. The goal is to have the pieces small enough to fit into a roasting pan and to cook evenly without taking too long. You don't have to remove the stem, but you can if you want to. I usually end up with pieces no more than 6 inches across at their widest point. You can also use a large glass pan, so long as it has high sides.

After you quarter it, scoop out all the seeds, and start laying your wedges in your pan, skin side up and flesh side down. This year I did two pumpkins and ended up layering the wedges. It was fine; just make sure there is a little room between them. Add about 1" of water to the bottom of your pan to keep the pumpkin from burning and keep the flesh nice and moist. Cook for 60 - 90 minutes, testing with a fork. When the fork pierces the skin and flesh in multiple places easily, it is done. Remove from the oven and allow to cool enough to handle. If some water drains out, just pour that off, but don't be too overly concerned about it. The recipe allows for the extra liquid of fresh pumpkin.

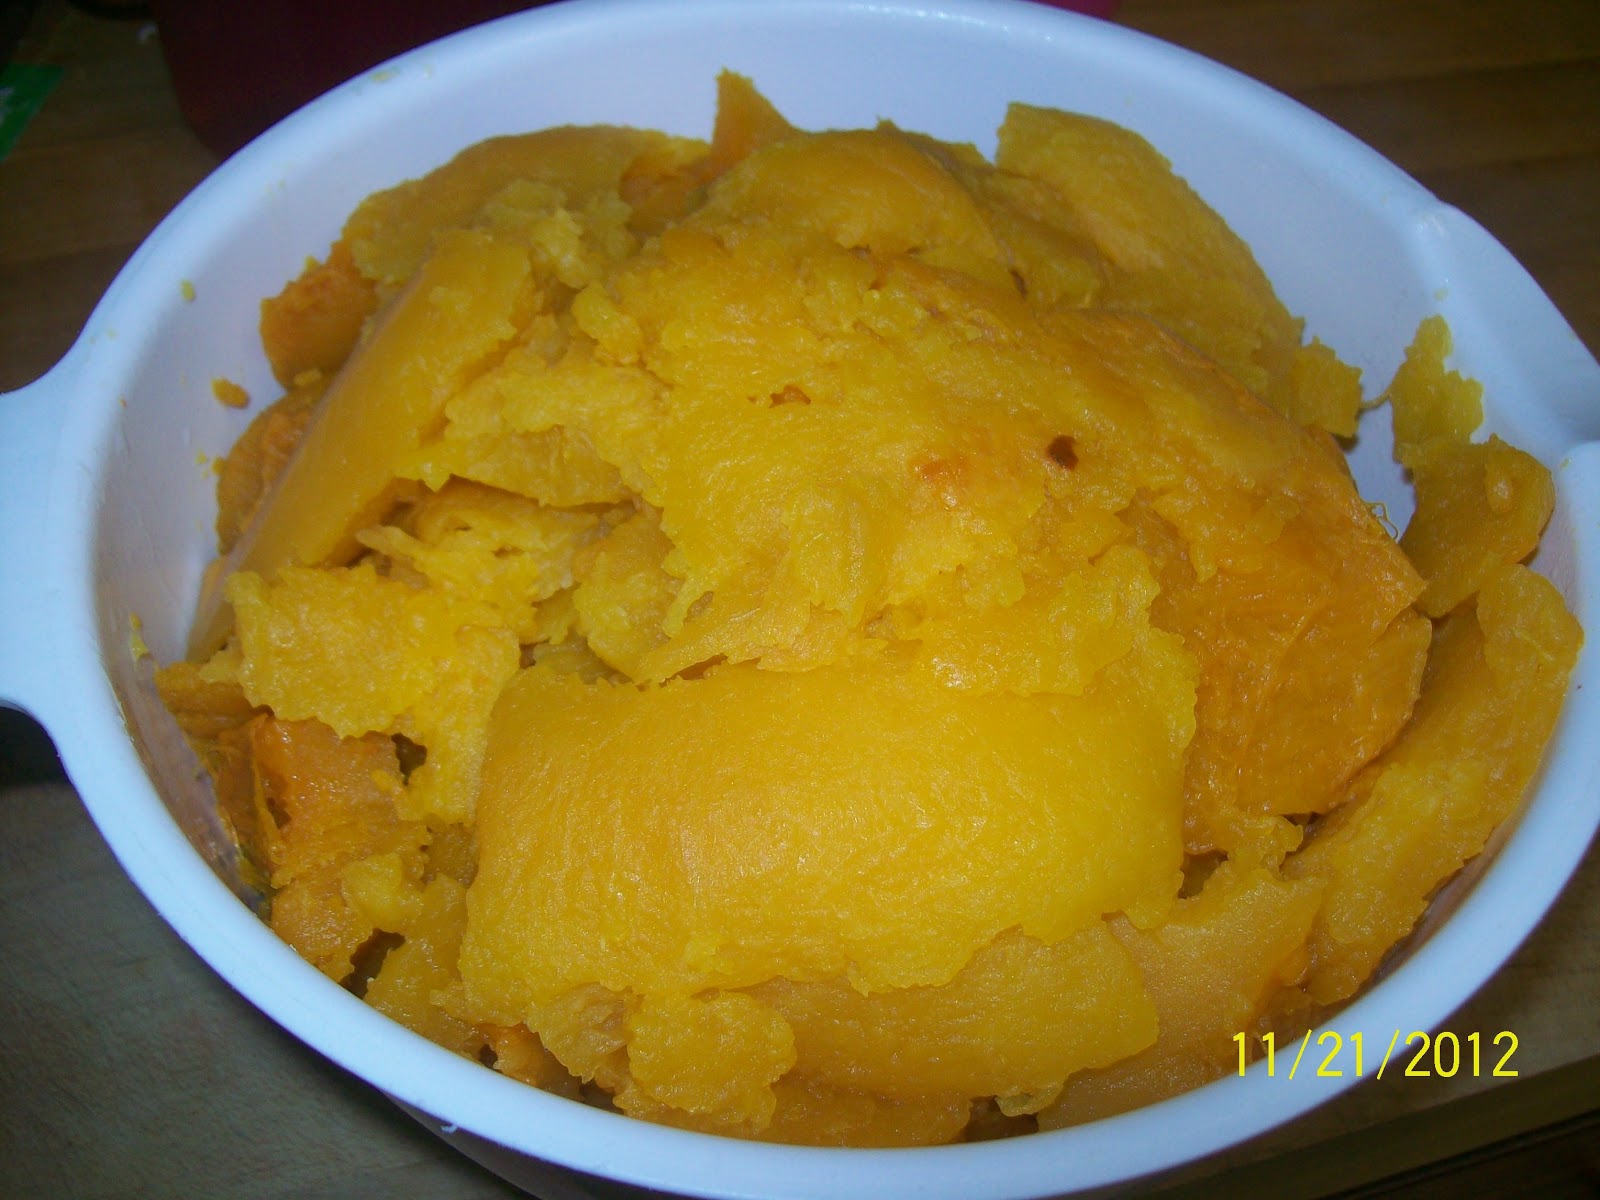
After it is cool enough you can pick up the pieces with your bare hands and not burn your fingerprints off, use a large spoon to start scooping out the insides. Be careful not to get any of the skin. Put it all into a bowl.  You'll have a pile of beautiful orange pumpkin flesh in no time!


Next, get out your  trusty blender or hand mixer. I like the blender because it keeps the splatter contained. Always make sure you use the lid! I never understand why the contestants on Top Chef and Chopped have such a hard time with that. I've never had a blender explosion like they have... But anyway. Blend your pumpkin flesh down into a nice smooth puree. You'll need 3 cups of puree per pumpkin pie. If you have more than this, you can freeze it for another time. I made two pumpkin's worth, and have 6 more cups of puree in the freezer for another time! YUM! I recommend freezing it in 3 cup increments for easy use later.

Here is your recipe (modified slightly from the one linked above):

  • 1 cup sugar
    •  Instead of sugar, you could use honey (use 1.25 cups), natural sugar (1 cup), agave (1 cup), brown sugar (1 cup), Stevia (1/3 cup) or Splenda (1.25 cups).
  • 1.5 teaspoon ground cinnamon
  • 1 teaspoon ground cloves
  • 1 teaspoon ground allspice
  • one half teaspoon ground ginger
  • one half teaspoon salt (optional)
  • 3 large eggs
  • 3 cups pumpkin puree
  • 1 can (12oz) of evaporated milk
  • 1 teaspoon of vanilla extract
Mix well using a hand blender or mixer.
Note: You may substitute 4 teaspoons of "pumpkin pie spice" instead of the cinnamon, cloves, allspice and ginger. I prefer to have more control over spice proportion, so I use the individual spices instead.
Note: Fore a lighter, less dense pie, use 4 eggs and 1.5 cans of evaporated milk.

This mix is very runny, but don't worry, it makes a lovely pie. Preheat your oven to 425. Pour the mix into your pie crust and bake for 15 minutes. Lower the oven temp to 350 and bake for 45 to 60 minutes longer, until a knife inserted in the middle comes out clean.


Isn't it just drool-worthy? Be careful though. Your guests won't appreciate the drool.

Now, at this point, most people would be done, and you could move on to preparing the rest of your (in this case) Thanksgiving feast. Which I did. The big day came around and much family togetherness was had. Everyone enjoyed the turkey, which I'm shamelessly also going to post a picture of, just because I was so darn proud of it.


That's 17 lbs of finger-licken' goodness right there. Not in front of your guests though, especially your MIL.

After you've had to loosen your belt or change into sweat pants from all the yumminess, you can proudly bring out that homemade pumpkin pie along with all the other sweets. I attempted a pumpkin roll this year and it turned out wonderfully, if I do say so myself. I didn't use my homemade puree, but only because it wasn't done yet by the time I baked the pumpkin roll.


NSFK (not safe for kids). Seriously, there's so much powdered sugar in those bad boys you'll be scraping the kids off the ceiling. They are 10 Weight Watchers points per slice. But OH MAN are they good. Ahem.

Now, luckily, my husband was the first one to get pumpkin pie and he quickly realized "something" was missing. You notice how I very neatly bullet-pointed all the ingredients above? Well, when I printed the recipe off originally... it wasn't that way. You'll thank me later, and here is why. I forgot the sugar! Big oops. I quickly discovered this pie is very forgiving though. I scooped all the filling out and into a mixing bowl, added the sugar, gave it a quick blend with a hand mixer, and scooped it back into the pie crust. I evened it out with a spatula, accounting for the missing slice, and it still looked good, and tasted better! LOL

Well, learn from my mistake. This is what happens when you allow your preschooler to help with the baking. It is easy to lose your place in the recipe! After relating this story to a friend, she said that she puts all the ingredients on the counter in order, and as she uses them, she puts them away. That way, she can't miss anything. Great tip! Happy baking, my friends!

Sunday, October 21, 2012

When Allergies Lead to Crunchy...


At MOPS (Mothers of Preschoolers) this year, the theme is “Plunge,” as in, “Plunge right in!” So, that’s what I’m going to do this year. I don’t often talk about myself on an intimate level (and especially not on paper), but this year is about focusing on getting to know each other better as mothers, friends, and women. In that spirit, I’m plunging right in!

I stink. Yes, you read that right. It started in the middle of my pregnancy for my second child, Andrew. I became allergic to something in commercially available deodorant. I frantically tried many of the “natural” deodorants with not much success. When I’m out and about during the day, I often sneak in another application of deodorant just before getting out of my car. I cringe inwardly when someone stands just a little too close, and keep my arms tucked tightly to my sides. I always take the bottom half of hugs. I fervently hope that the people sitting next to me have stuffy noses… for their sakes.

It has been a big struggle to accept this part of myself. Of course I would never go back to B.K. (Before Kids), but just what was it about my dear son that made my body so different? And what am I to do about it? 

God, grant me the serenity to accept the things I cannot change...

Thankfully, I have recently developed a passionate relationship with Pinterest, and found a homemade deodorant recipe there good enough to cover up “Texas Summer Man Smell.” Well, that sounded promising!

  1. equal parts aluminum free baking soda and either arrowroot powder or GMO-free cornstarch (The creator uses about ½ cup baking soda and 1/2 cup arrowroot)
  2. mix with coconut oil until moist and then store in a jar
  3. seriously. that’s it.
  4. If you want to get fancy, though, add a little lemon, tea tree, rosemary, lavender or bergamot essential oil
  5. Natalie's Note: I react strongly to the alkalinity created by too much baking soda, so as recommended in the comments of the linked website, I decreased my proportion of baking soda. I used 2 Tbsp baking soda and 1/2 cup corn starch.
So, yes, as we bob along through life, clinging to each other as we would a life vest, remember that we each have our own trials, life changes, and sometimes body stink to deal with. Don’t let that come in the way of making new connections to those around you.

This year, for me, is all about making new connections by Plunging right in there. Love as if your life depended on it. At MOPS and in my Facebook group (Lansing Area Crunchy Mommas), the goal is to have no mother mothering alone, You are why I am here, and you are not alone.

Genesis 1:27 So God created man in his own image, in the image of God he created him; male and female he created them. (ESV)

Philippians 4:13 I can do all things through him who strengthens me. (ESV)


Friday, October 5, 2012

DIY Oven Cleaners

If there was a medal for cleaning ovens, I wouldn't even be a contender. The nasty chemical smell of commercial oven cleaners deterred me somewhat before having children, and it is a definite not-gonna-happen now that I've got three precious little ones underfoot. All. The. Time.

Ahem. But I digress. Over the last few months, as my love (obsession) of Pinterest has grown, I've pinned a few natural oven cleaners. In a fit of energy, I decided to put them to the test.

First up was probably the most simple. I pinned it from DIY Home Sweet Home. Simple baking soda, with enough water added to make a thin paste. I used a small paintbrush I keep in the kitchen for tasks just like this to spread the paste over the window. My door was also dirty, so I spread the paste over the door too. I wish I would have taken a paste-free before picture, but I was inspired to blog about it between pictures. So, here's the before! You can see it is pretty bad!


I left that to sit for a while. Long enough to cut up 1/2 pound of vanilla beans to make vanilla extract. More on that another time. I then wiped off a little corner of the window with just a wet paper towel to check our progress. It was ok, but not great. I finished wiping it all off and went in search of another recipe. I can't find the link now, but it was basically the same thing with hydrogen peroxide mixed in. So, I painted that on, and left it to sit again. You can see below half of the door painted with the new solution. It *is* a bit cleaner than it was! But the door is still pretty dirty.


And I waited about 30 minutes, then wiped it down. This time I used a scrubby sponge and put some elbow grease into it, but I am still not satisfied with the results:


So back to the internet I go! This time I found Crunchy Betty's oven cleaner and set to work:


30 minutes later, this is our result, with lots and LOTS of hard scrubbing this time.


Well, it is significantly cleaner than when I started, and that is a step in the right direction. I can't say as I'm putting much faith in homemade oven cleaner at this point though. All three websites promised me a sparkling oven with very little effort, but I certainly had to scrub pretty hard to get it to the point it is at now.

Do you have a favorite recipe?

Back to TOP